
A command is a request that can be sent to a unit. In response, the unit can send its coordinates, take a picture, activate an output, block engine, etc. Available commands depend on the type of device used and its configuration.
To be executed, a command should be configured in Unit Properties in the corresponding tab. To send a command, the user must have the rights specified in its properties, as well as the Execute commands right in relation to the unit.
Standard Commands
17 standard commands are reserved in MiniFinder GO:
| Icon | Command | Name in the system | Parameters |
|---|---|---|---|
| Query position (request current coordinates of the unit) |
query_pos | — | |
| Block engine | block_engine | — | |
| Unblock engine | unblock_engine | — | |
| Activate output | output_on | output number | |
| Deactivate output | output_off | output number | |
| Download messages | download_msgs | time interval (from – to) | |
| Set data transfer interval (how often unit sends data to the server) |
set_report_interval | interval in seconds | |
| Send custom message (to send a non-standard command to a unit) |
custom_msg | command text | |
| Send message to driver | driver_msg | message text | |
| Send position | send_position | coordinates | |
| Send route | send_route | checkpoints | |
| Send waypoints | send_waypoints | checkpoints | |
| Query configuration | request_configuration | — | |
| Start/Stop WiaTag | wiatag_service | — | |
| Upload configuration | upload_cfg | path to configuration file | |
| Upload firmware | upload_sw | path to firmware file | |
| Query snapshot | query_photo | — | |
| Query snapshot from camera | query_photo_cam | camera’s number | |
| Query DDD file (for tachographs) |
query_ddd | — |
![]() To download the requested configuration file, use the Disketta application (the required file is located in the Unit folder). To find out the name of the configuration file, generate a table with messages for the corresponding period.
To download the requested configuration file, use the Disketta application (the required file is located in the Unit folder). To find out the name of the configuration file, generate a table with messages for the corresponding period.
![]() If your device supports a command that is not mentioned in the list above, this command can still be sent. To do this, use the standard command Send custom message. In this case, you should know the exact name of the command (as it is written in the device configuration).
If your device supports a command that is not mentioned in the list above, this command can still be sent. To do this, use the standard command Send custom message. In this case, you should know the exact name of the command (as it is written in the device configuration).
Sending and Tracking Commands
There are several ways to send a command to a unit:
- Manually from the Monitoring panel, including sending the command to a whole group of units.
- As a job ran automatically according to a schedule.
- As an action for a triggered notification (command is sent when specified conditions are met).
- From a mobile device using a plain SMS text message.
- From the MiniFinder GO Mobile Client.
![]() Such commands as Upload configuration and Upload firmware have their own peculiarities. If these commands have been saved for units without selecting a file, sending these commands as a job/notification or sending them to the whole group of units is impossible.
Such commands as Upload configuration and Upload firmware have their own peculiarities. If these commands have been saved for units without selecting a file, sending these commands as a job/notification or sending them to the whole group of units is impossible.
![]() Such commands as Send route and Send waypoints also have some peculiarities. When you send them, you should manually indicate the route parameters. Therefore, these commands cannot be sent via job or notification.
Such commands as Send route and Send waypoints also have some peculiarities. When you send them, you should manually indicate the route parameters. Therefore, these commands cannot be sent via job or notification.
Information about commands sent to a unit is available:
- In the Messages panel (all commands sent to a unit).
- In the Executed commands report (only successfully executed commands).
- Immediately after sending a command — in the log.
Executing Commands from the Monitoring Panel
Command can be sent from the Monitoring panel. This option must be activated in the Monitoring panel customizer. The button can have different looks:
![]() there are available commands for the selected unit;
there are available commands for the selected unit;
![]() there are GPRS commands among the available ones;
there are GPRS commands among the available ones;
![]() or
or ![]() there are no commands supported by the selected unit or the current user has not enough access to the unit.
there are no commands supported by the selected unit or the current user has not enough access to the unit.
Put the cursor over the active button next to the required unit to see the list of available commands. The list can contain only commands configured in Unit Properties => Commands. Furthermore, only commands available at the moment are shown (the availability of link types is important here).

- Click the command button
 or
or  .
. - Select the required units. This step can be omitted if a command is sent to one unit.
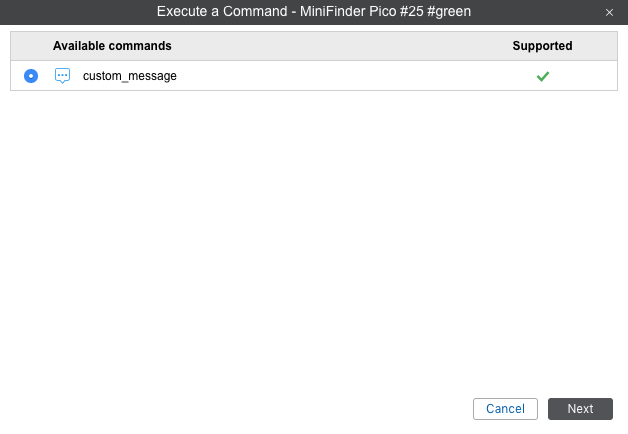
- Select a command from the list of commands available at the moment. When sending a command to several units, special symbols indicate whether this command can be sent to all selected units or only to some of them:
 all selected units support this command;
 not all of the selected units support this command (more information is in the tooltip).
- If needed, set additional parameters, for example, input/output index, report interval, path to load a configuration or firmware file, checkpoints of the route, etc.
- Press OK. The command is executed immediately, and its result is reported in the log. To show or hide the log window click on the double-arrow in the right bottom corner of the window.
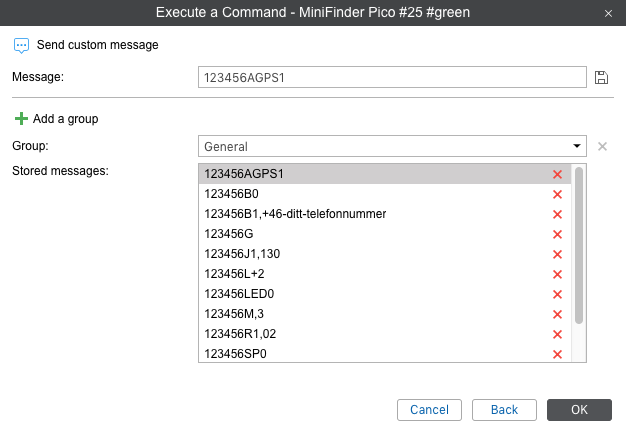
- While executing the Send custom message command, it is possible to enter the text in the following ways:
- You can enter the message manually in the corresponding field. To make the search process easier during the next command execution, it is possible to add a message to a group. The principle of working with groups has been described above.
- It is possible to choose a previously saved message. In the drop-down list of groups, choose the one which contains the message. Below, you get the list of available messages. Select the required one and press OK to execute the command.
![]() Note.
Note.
To send a command to a group of units, it is necessary that this command be registered in the propertis of each of these units on the Commands tab and have the same name. If, when sent to several units, the command is called the same, but belongs to a different type and the parameters are not specified, then the command is sent without parameters and, as a result, cannot be executed.
Chat with Driver
The operator (dispatcher) can exchange messages with drivers. To do this, select the Send message to driver command and enter the text.
In case the driver answers, the message appears in a special pop-up window. A new message can be accompanied by a sound (see User Settings). If you have unread messages, the number of them is indicated in the red circle next to the chat icon in the bottom panel. If there are any messages in the window (either read or unread), the icon itself is active which means it is coloured and can be clicked on.
Newly received messages are added to the top of the list. Unread notifications have a blue background by default. To expand/hide the full text of a message, use the switch button (+/-) or click on the header of the notification outside the text.
When clicking on a message, the map is centred on the place where this message was sent. When clicking on the unit name, the map is focused on its last location.
To delete a message, click on the cross to the right of its title. You can also delete the read messages or all messages if you use the appropriate buttons at the bottom of the messages window. The window is closed automatically when you delete all messages. If the online notifications window is closed by clicking on the grey cross in the upper right corner, the window stops appearing automatically when new notifications are received. Click on the corresponding button in the bottom panel to open the window.
In addition, the window itself can be dragged around the screen and resized. The position and size of the window is remembered until the next opening.
The operator can quickly send a reply to the driver (the Send messages to driver command should be configured in the unit properties in advance). Click on the green triangle-shaped button and enter the responce text in the dialog box to send it.
Besides, you can generate the report called Chat, which contains all the chat history including the operator and driver messages for the specified period of time.
![]() Note. The automatic appearance of messages from the drivers on the screen can be turned off. To do this, uncheck the Automaticall display popup eventsbox in the user settings. In this case, the arrival of a new notification will be indicated only by the appearance of a figure in a red background in the bottom panel of the program next to the communication icon. To read the notifications, you need to click on this sign.
Note. The automatic appearance of messages from the drivers on the screen can be turned off. To do this, uncheck the Automaticall display popup eventsbox in the user settings. In this case, the arrival of a new notification will be indicated only by the appearance of a figure in a red background in the bottom panel of the program next to the communication icon. To read the notifications, you need to click on this sign.
Correspondence with driver can be fulfilled with the help of a specially developed app — Chatterbox. This application allows to send not only commands but also SMS messages.
Sending Route/Sending Waypoints
To send a route, it is necessary to indicate its name in the corresponding field of the dialog.
To send a route/waypoints, it is necessary to indicate its checkpoints in the command dialog. Checkpoints can be found in various sources: addresses, geofences, routes. You can apply the search filter (buttons at the top of the dialog) which helps you to expand/narrow the number of sources to be used. Enabled button means that the corresponding source is applied as a filter.
To indicate a checkpoint, start typing in the corresponding field. In the dropdown list, depending on the filter used, you can find the possible variants along with their source information.
Moreover, you can add a checkpoint directly from the map. To do this, click on the ![]() icon to the right of the field. Move on the map to the target position, and double click on it. As a result, a checkpoint will be indicated automatically.
icon to the right of the field. Move on the map to the target position, and double click on it. As a result, a checkpoint will be indicated automatically.
If a checkpoint is added from a route, all the points of the route are added. However, if the route contains moving units as checkpoints, they will be omitted.
the coordinates of the first checkpoint are used when you add them from line or polygon type geofences.
After the required checkpoint is entered, a green check mark appears to the right of it. This check mark is a point validity indicator which shows that a checkpoint possesses coordinates. The checkpoint name cannot be edited, it is filled in automatically. If you try to edit the name, the search results will be reset (point validity indicator disappears) and you should start the search again. Every indicated checkpoint has a Notice field under it. This field is optional.
The indicated checkpoints can be saved as a route, and afterwards, you can use it in the Routes panel of the tracking system. To do this, check the box at the bottom of the dialogue. You can also give a name to the route during checkbox activation (for sending waypoints only). Click OK to complete the procedure. Route saving takes place simultaneously with the sending of the command.